Setup Mischief Maker
Mischief Maker is made up of four components; two Twitch Extensions (one for viewer actions and an optional overlay for showing alerts and status info), a desktop client used to connect Twitch to your dedicated server, and a server mod to add support for special commands used by Mischief Maker. Installation should be straight-forward and is outlined below.
Requirements
- Partner or Affiliate status on Twitch to enable the use of Bits.
- A dedicated server (local or hosted) running Alpha 19.3 or later.
Step 1: Install the Mischief Maker Twitch Extension
Click the link below and follow the instructions on Twitch to install the extension.
Install Twitch Extension
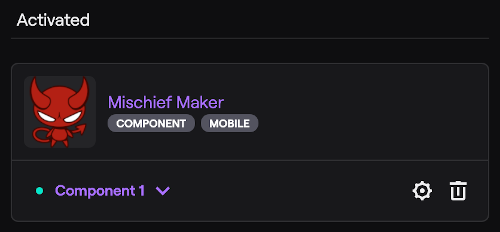
Once installed, go to Extensions in your
Creator Dashboard and find Mischief Maker. Click the Activate button and set it as an active Component or Panel. When set to Component (recommended), the extension is hidden until the viewer hovers their mouse over the stream. Panels are shown below the stream. On mobile, the extension icon is always shown between chat and the video.
Step 2: Configure the Mischief Maker Twitch Extension
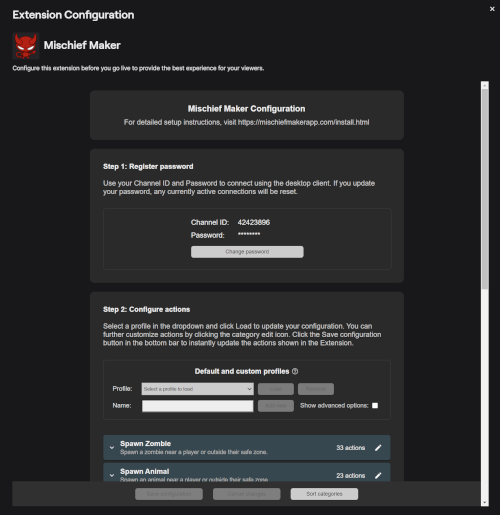
In the Mischief Maker extension configuration screen (click the gear icon), enter a password and click 'Register'. The Channel ID displayed here and the password registered will be used in the desktop client to connect to the Twitch Extension.
Not all actions are enabled by default. Click 'Customize configuration' below to add/remove/modify actions. Several profles are available that you can load and then further configure. For each action, you can set a Bit amount, cooldown and a Bits only requirement. Use the drag icon to reorder groups and/or actions. When you save changes, viewers will be updated automatically without needing to refresh the extension.
Step 3: Install the Mischief Maker Companion Twitch Extension (Optional, Recommended)
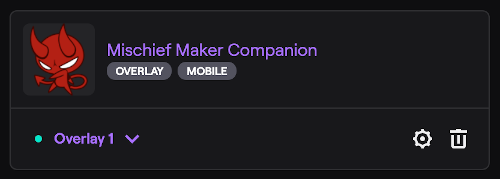
The companion extension adds an overlay for displaying alerts and useful info such as the latest viewer actions, active curses and queued actions. This second extension is optional but recommended (Twitch requires this to be a separate extension).
Install Companion Twitch Extension
Once installed, go to your Extensions dashboard and find the Mischief Maker Companion extension. Click the Activate button, and set it as an active Overlay. You may optionally configure the extension to hide specific sections or change the alert position and font. Viewers can also configure this independently by clicking on the gear icon shown in the corner of the overlay.
Step 4: Set up a dedicated server
Either local or hosted server will work but a local dedicated server will have the best performance and is recommended.
If you don't already have a server installed, use Steam to download and install 7 Days to Die Dedicated Server. It can be found under Tools so be sure to have that category enabled (click the Games dropdown above the search and list of games). After installation, open up the serverconfig file located at \Steam\steamapps\7 Days to Die Dedicated Server\serverconfig.xml with a text editor like Notepad (the xml file may open in a browser by default).
In XML files, properties are defined with the format <property name="TelnetEnabled" value="true">. Name shows the property name and value is what you need to update (inside the quotes).
Make sure TelnetEnabled is set to true. Set the TelnetPassword and take note as you will enter this and the TelnetPort value into the desktop client. Also make note of the ServerPort and ServerPassword as you will use these when joining the game.
That's it! Save and close the serverconfig file. You must always restart the server for new settings to take effect.
If you are using a hosted solution, you will not be using the TelnetPort shown in this file. Hosting providers allocate their own port numbers and show this somewhere in their interface (often labeled as RCON port).
Step 5: Install the Mischief Maker server mod
Extract the downloaded zip file into the "Mods" folder inside your dedicated server installation directory. The folder structure should look like
/7 Days to Die Dedicated Server/Mods/MischeifMaker/ModInfo.xml.
Download Server Mod
If the Mods directory does not exist, you will need to create it. If a previous version of the Mischief Maker mod is already installed, please delete it first. After extracting the mod, restart the dedicated server to complete the mod installation.
If you are using a hosted server, you will need to need to upload the mod to that server. Most hosted servers provide a way to upload files. Since the mod contains a DLL file, it is likely that you will need to contact the hosted server company to allow you to add this file but this is generally not a problem.
Step 6: Install Java 11 or higher (optional)
Note that you can skip this step if you download the normal 93mb desktop client and not the smaller stand-alone version linked below the download button.
Run
java --version in the
Windows Command Prompt. If Java is not found or you have an older version, please download and install Java
here. Select the version OpenJDK 11 (LTS) and the JVM HotSpot and then download and install the latest release.

Step 7: Download the Mischief Maker desktop client
The desktop client is used to connect the Twitch Extension to your dedicated server. It does not need to run on the same machine as the dedicated server but it must be able to reach the server, either locally or over the network.
Download Desktop Client
Double click the downloaded exe file (or jar file if you downloaded the smaller stand-alone version) to launch the application. If you are having trouble opening the desktop client, you may have conflicting Java installations. Uninstall all JDK and Java programs and reinstall the Java version listed in the previous step.
Step 8: Configure the Mischief Maker desktop client
 Mischief Maker
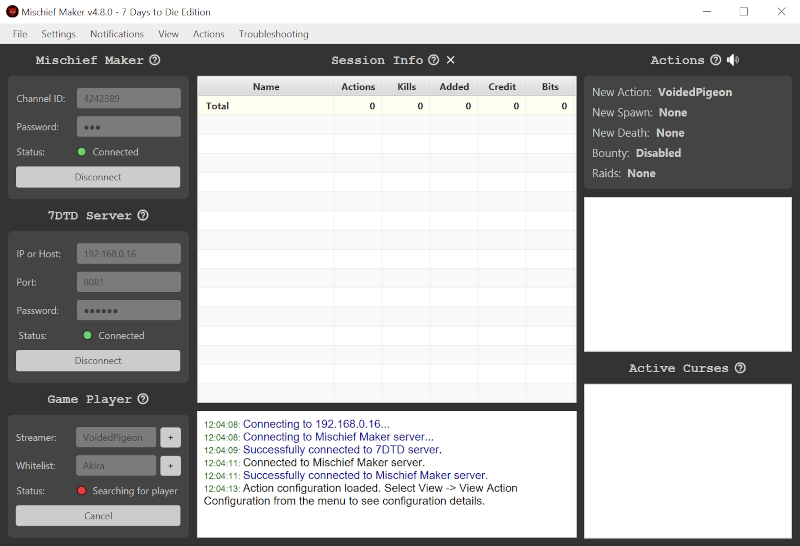
: Enter your Channel ID and the password registered in the Mischief Maker Twitch Extension configuration screen. Press 'Connect' to connect to the Mischief Maker server.
7DTD Server: Enter the IP address (or hostname) of your dedicated server. If you are running the desktop client on the same machine as your dedicated server, you usually can use 127.0.0.1 for the IP address. The telnet port and telnet password is different from your player connection settings and can be found in the server config file located at
\Steam\steamapps\7 Days to Die Dedicated Server\serverconfig.xml. Look for the
TelnetPort and
TelnetPassword properties. Also make sure
TelnetEnabled is set to
true. Press 'Connect' to connect to your dedicated server.
Game Player: By default, the desktop client will select the first player found but you can either enter the name of your player here or select a player using the add button. The Streamer player will have access to all
in-game chat commands. Add players to the Whitelist to allow viewers to select them as the target for actions. Press 'Enable Mischief' to go live and enable actions. You can disable actions at any time by pressing 'Disable Mischief'. Actions will automatically be disabled/paused when the Streamer player is dead, not in the game, within a safe zone, or set to afk.
Session Info: A running total of viewer action count, kills, Bits and credit is listed in the Session Info table, sorted by Bits. Use the Save/Load Session Info options in the File menu to export and import session stats. Connection and action messages are displayed in the log section below.
Recents: The latest viewer spawn, action and attributed death will appear here. Streaks are shown with an 'x' and the streak count. Click on the remove icon to clear/reset the name.
Actions: All actions recieved from Mischief Maker appear here with the most recent on top. Pending actions will appear with a red background. Once delivered, the background will change to blue and once the server has been notified and the action is completed, the background will become white. You can right click an action to cancel, refund, reissue or attribute death.
Note: When a new action is received, the desktop client plays a bell sound effect. You can mute this by pressing the speaker icon above the action list or customize using the Configure Alert Sound option in the settings menu.
Active Curses: Currently active curses like Spawn Multiplier and Resurrection will appear here. Right click on a curse for an option to cancel it.
Step 9: Fight some zombies!
Once actions are enabled and all three left hand panels have a green status, viewers on Twitch will be able to interact with you using Mischief Maker.
The desktop client listens to in-game chat and responds to a number of commands. Note that only the player named in the Streamer field in the desktop client can issue most of these in-game chat commands.
View Game Chat Commands
Twitch Extensions can be difficult for viewers to discover. It is recommended to have a chat command (e.g. !mm) or bot explain to viewers that they need to mouse over the stream to see the Twitch Extension (or scroll down below the stream if set as a panel).
Troubleshooting
In the case of any trouble or if the app becomes unresponsive, it is safe to close the desktop client and relaunch while streaming. Press the 'Enable mischief' button to automatically reconnect to both the Mischief Maker server and the dedicated server. All pending actions will be redelivered up to 36 hours. Please note that cooldowns are not automatically restored.
7 Days to Die is still in Alpha and in rare cases, the zombies stop dealing melee damage and the pathfinding A.I. stops working. Restarting the dedicated server should fix this.